 |
| Tomahawk and Spitfire getting their desert colours. You can see the original paint scheme in the wheel wells of the spit. |
Sunday, 28 February 2016
Whilst The Tin is Open
Well after the quest for Azure was finally over it would have been rude with the tin open not to paint something with it, now wouldn't it. So the Tomahawk which started all this off was finished off underneath with an ok coat, though with it being the third coat some of the detail is now obscured. But what to paint next..... Well there was the that Mk1 Spitfire the youngest had made and started to paint a few years ago when I started the Tomahawk and it was sat in my bits box. Ok it wasn't he greatest made and the paint job on the bottom was pretty poor so why not. Did Mk1 Spits serve in North Africa? No idea, and actually I don't care that much. It'll probably get used more for set dressing and a target for an airfield assault scenario I have in mind.
The quest for Azure
Not these ones, which is spelt differently anyway.

But the colour used for the underside of RAF planes in North Africa during WWII.
I have the Airfix Curtiss Tomahawk IIB (airfix.com/curtiss-tomahawk) which I started building far too long ago.
 I used the correct Humbrol 157 for the underside, thought as it was going on that it was a bit dark and grey but hoped it would dry lighter and more... well blue I guess. But it didn't, much to my disappointment. So I tried mixing my own but wasn't super happy and I feared I was starting to obscure the etched detail as well.
So I started to look in to the matter and was amazed at how hard it was to get an authentic Azure Blue for the underside of my little plane. There was an 18 page discussion on britmodeller.com for a start which took some time to go through and actually get to the answer.


Thought I was going to be getting a Vallejo bottle from somewhere on line as this was looking to be about the best, until I reached the details about Precision Paints and there excellent attempt. But as I read further and further down the thread it appeared Humbrol had listened to their customers, and the research they had undertaken, and reformulated the colour to and excellent standard. Problem was they hadn't changed the tins, but there was a way to tell using the numbers on the sticker on the bottom. So the next time I was in town with more time than
just the run in for the bog shop I nipped to the local hobby shop (mainly train stuff) and picked up a tin with the correct numbers on the bottom.
 So once home and family duties out of the way I couldn't wait for the moment of truth, would this be the dull grey or a nice blue with a violet tinge.....?
Well as the lid was carefully prised off a light violet blue greeted my eyes, and a smile crossed my face. Though I must admit that I thought it was way lighter than I thought it was going to be, especially compared to my amateur attempt at mixing my own version which now seemed far far too blue, as can be seen from the pic below. The 157 Azure Blue was also a bit thinner than I thought despite some vigorous stirring and didn't coat as well as my acrylic experiences and I was fearful of the detail being totally obscured. But we'll see how it dries and what a bit of weathering can do (even if it is my first attempt).
In conclusion, it's taken Humbrol a long time but they've come up with the best Azure Blue around. Just a shame they couldn't do it in acrylic as well.
But the colour used for the underside of RAF planes in North Africa during WWII.
I have the Airfix Curtiss Tomahawk IIB (airfix.com/curtiss-tomahawk) which I started building far too long ago.

So I started to look in to the matter and was amazed at how hard it was to get an authentic Azure Blue for the underside of my little plane. There was an 18 page discussion on britmodeller.com for a start which took some time to go through and actually get to the answer.


Thought I was going to be getting a Vallejo bottle from somewhere on line as this was looking to be about the best, until I reached the details about Precision Paints and there excellent attempt. But as I read further and further down the thread it appeared Humbrol had listened to their customers, and the research they had undertaken, and reformulated the colour to and excellent standard. Problem was they hadn't changed the tins, but there was a way to tell using the numbers on the sticker on the bottom. So the next time I was in town with more time than
just the run in for the bog shop I nipped to the local hobby shop (mainly train stuff) and picked up a tin with the correct numbers on the bottom.

 |
| The moment of truth |
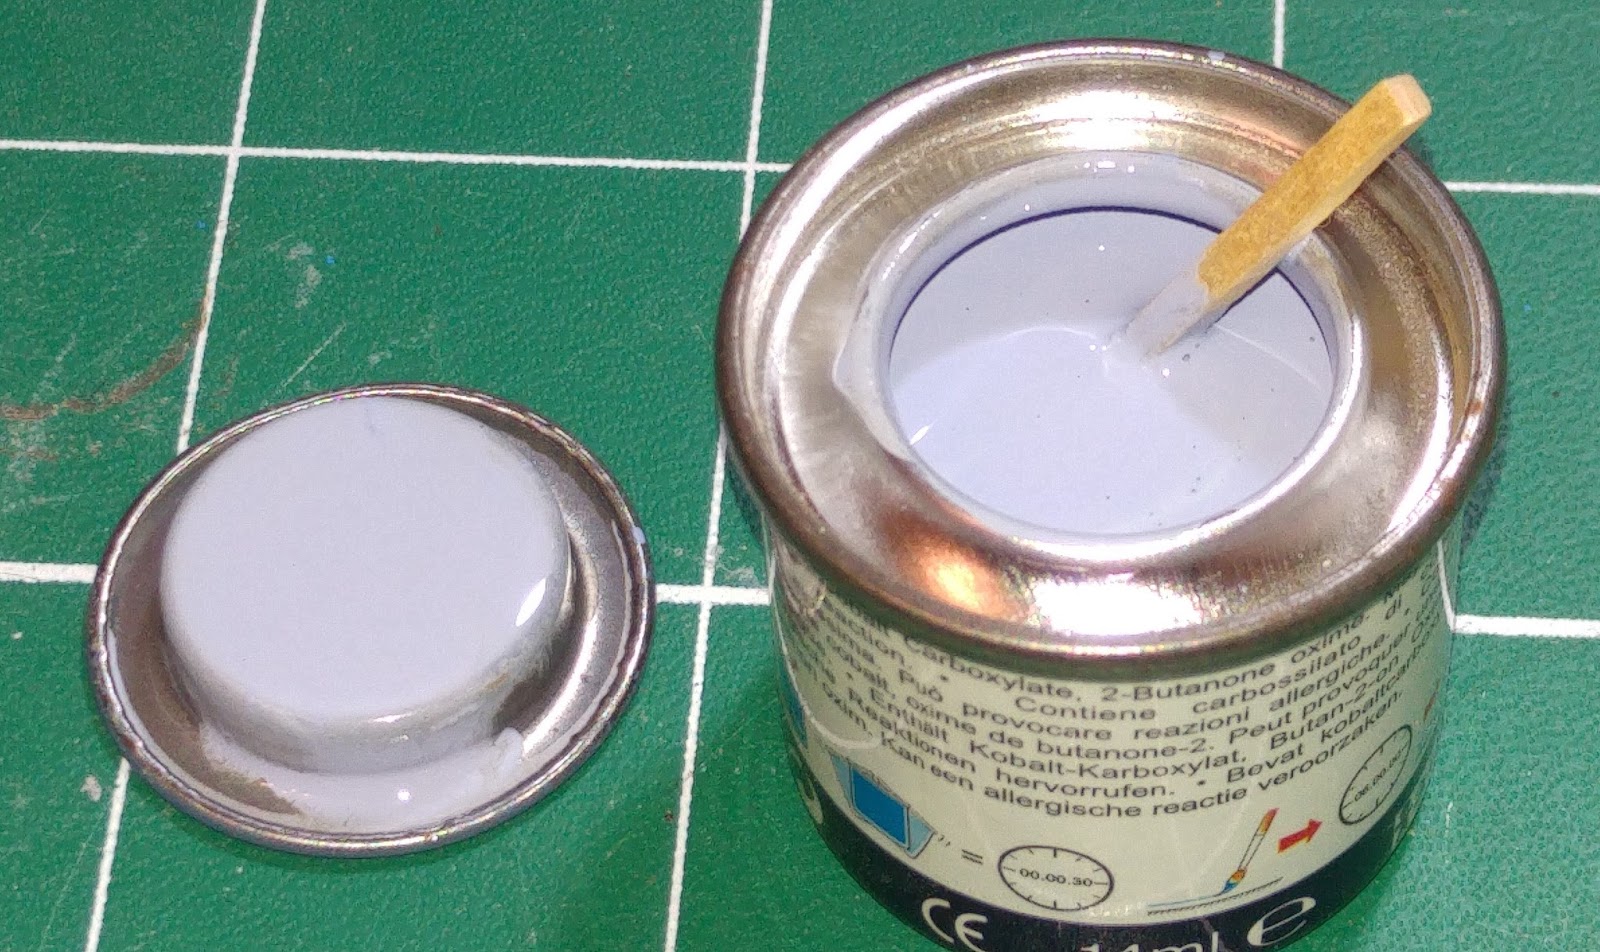 |
| Success (though paler than I thought it would be) |
 |
| My own attempt next to the Humbrol 157 (still wet), the wheel wells show the original 157 which came with the kit. |
In conclusion, it's taken Humbrol a long time but they've come up with the best Azure Blue around. Just a shame they couldn't do it in acrylic as well.
Saturday, 20 February 2016
Lost First Post
We live and learn. Whilst trying to delete a draft version of my first post I managed to actually delete my first blog post, oops. Well here goes a brief attempt at recreating it...
I'm Andy and this is my blog about modelling and painting. Growing up in 1970s UK I played a lot with toy soldiers and built model planes and tanks, mostly Airfix but plenty of others in there to. This lead to wargaming and RPGs, and even a fair bit of LARPing, in my teens, later teens and early twenties. Then girls and cars and other such important matters took over and the games and toy soldiers were put away in my parents loft.
Fast forward 20 or more years and life marches on as it does, the toy soldiers have been moved from attic to attic to garage, but they never got thrown away. I've tried to get going again in the hobby a few times over the years, tried to get my own boys interested (with very limited success) but never had the space to leave a nice painting area set up.
So with Christmas approaching my better half asks what I want and, having seen Big Lee of Postie's Rejects get a new painting desk (link) my present was decided. I had to do the searching, the collecting and (come to think of it) the paying for a lovely 1946 walnut writing bureau, complete with original sales receipt. And hence the name for the blog was set.

Now I have somewhere to store all the paints and models and other bits and pieces I have been acquiring for the last few years whilst trying to get back in to this.

So I hope this blog will give me the kick up the arse to actually get some modelling and painting done for a change.
Cheers
Andy
Thursday, 18 February 2016
Let there be light
So as I'm tucked away in a dark corner working (or soon to be working) in my own shadow I needed a descent light to work by. Thing is it had to be reasonably in keeping with the bureau, so a traditional bankers desk light seemed about the best choice, coupled with a descent daylight lamp. Now these seem to range from cheap to stupid price, and of course the look I want fell in to the stupid price so a compromise had to be made and I ended up with a shiny brass rather than the antiqued look, but a proper glass shade and able to take a more powerful lamp.

So with the light ordered I found the most powerful LED lamp I could, 1901 lumens at 6500k (link), and boy is it bright. But to be honest I'm a little disappointed that the lamp has so much plastic before the lamp proper and it limits the light to one end. But it'll do for now, I can twist it round a bit and get plenty of light to work by.

So the obstacles stopping me getting some painting done are getting fewer and fewer :-)
Subscribe to:
Posts (Atom)